Showing posts with label almond flour. Show all posts

5/26/13

I Might Be Back! (And a recipe for Cheesy Biscuits)

Well, hi everyone! 
It's great and scary to be writing this blog post for you. I've not blogged in over a year (has it really been that long?) and have had good reason. I've moved across the country, been dealing with some heath issues, and have been adjusting to a new job in a new city. Lots of overwhelming things. But thankfully God is good. And here I am, slowly gaining traction in my new life. 
See, I was planning on putting together a little cookbook but that got pushed to the (way) back burner. I think someday I will do it, but now is not that time. But I often have people ask me for my recipes so I thought I'd post some of them here for you lovely people. No guarantees on how often I'll post, but I promise will get a few good ones out to you! :)
I thought I'd kick off this new season of posting with a recipe that I've made over and over (and usually with my little nephew helping me) because they are just that good and easy. 
Cheesy Biscuits!
Yep, cheesy and buttery and grain/gluten free! Now, these aren't like Pillsbury flaky biscuits or the kind that you'd get at a diner with gravy.  These have a different texture- perhaps like a cheesy cornbread texture? (I've never liked cornbread, just so you know.) Anyway, they are prefect with any meal right out of the oven! Yum, just writing this post is making me want to go bake these right now. 
Ok, enough with the talk, here's the recipe (and photos!)
Fresh out of the oven!
Biscuits and gravy. YUM!
me with a tray of goodness :)


LC's Best Biscuits


• 1 ½ c fine almond flour ( I like Honeyville, but most kinds will work)
• ¾ c shredded mozzarella cheese (or whatever kind of shredded cheese you want.)
• 6 tbsp butter, softened
• 2 eggs
• 1 tsp aluminum-free baking powder
• 1/4 tsp xanthan gum
• 1 ½ tsp cider vinegar
• and dash of salt

- Preheat oven to 375º and line a baking sheet with parchment paper.
- With a stand or hand mixer, combine all ingredients well.
- Portion out six to eight equal scoops of dough (free-form adds to the charm) about two inches apart on the cookie sheet.
- Place in oven and reduce heat to 350º.
- Bake for 12-15 minutes or until browned.
- Remove from oven and serve right away. 

*Please let me know what you think of them or how you altered them to fit your lifestyle. I'd love to know! 
Thanks for reading.
- Lindsay
© Lindsay Coleman - do not use or reproduce without giving direct credit and linking back to this post. 

1/30/12

- Pumpkin Walnut Cream Cheese Muffins -


   I know we're a ways past Fall and traditional "pumpkin season" but I have a great recipe for you! While I was visiting family for Thanksgiving, I got to bond with my littlest nephew Z [he's almost two]. He saw me baking and cooking every day and associated me with the mixer. It was too cute. First thing in the morning two days before my trip ended, Z saw me, took my hand, walked me to the cabinet with the mixer, and handed the mixer to me. All while saying in his cute voice, "Cinnnnmiiinnn, Nutmeg."  That was his sweet little way of telling me, "Let's bake, Aunt Linny!" :)  And though I didn't have plans to bake anything right then, I couldn't resist spending time with Z and letting him help me bake.
 the cutie pie with the mixer
So that's when I came up with this recipe for Pumpkin Cream Cheese Muffins with Walnuts. And, boy, am I glad Z wanted me to make something! These muffins turned out so well. Much better than my first pumpkin muffin attempt! They've got a great consistency, and spicy-pumpkiny flavor, and the walnuts add a nice crunch. The cream cheese makes it even better with its creamy sweetness.  Definitely a crowd pleaser. Everyone that tried these really liked them. Including little Z.

MUFFIN

• 3 eggs
• ½ c ZSweet

• 4 tbsp butter, softened
• 1 c almond flour
• 2 tbsp coconut four
• 1 ½ tsp baking powder
• ½ tsp salt
• ½ c pumpkin
• 1 ¼ tsp xanthan gum
• 2 tsp cinnamon
• ½ tsp nutmeg
• ¼ tsp cloves
• ½ cup of finely chopped walnuts

- Preheat oven to 350º
- Grease&flour muffin tin or line with liners.
- In a medium bowl, beat all ingredients- except walnuts- until well mixed.
- Add walnuts and stir to incorporate.
- Using a ¼ cup measuring cup, scoop batter into muffin tin filling ¾ the way up.
- Try to make an indent in the middle of each for the cream cheese.

CREAM CHEESE TOPPING

• 5 tbsp cream cheese, softened
• 1 tbsp heavy cream
• ½ tsp vanilla
• 1 ½ tbsp ZSweet, powdered [granulated works, too]

- In a small bowl beat ingredients until fluffy.
- Place about a tablespoon of mixture into indents in the dough.
- Evenly distribute any remaining cream cheese mixture.
- Bake muffins for about 20 minutes.
- Remove from oven and let cool in pan at least 10 minutes prior to eating.

ENJOY!


And check out these recipes from others:
Simply Sugar & Gluten-Free

1/21/12

- Hamburger Buns & Cranberry-Herb Bacon Avocado Burgers -


   Let me just start by telling you that I really, really, really like cheeseburgers and all of the various ways they can be eaten. And I can barely express how excited I was about having a bun for burgers again! Something that's typically lost when switching to this lifestyle is that there's no bread so you can't hold a sandwich or burger as you generally would have. One day I was bummed to have to use a fork and knife to eat a burger and thus was determined to create an adequate hamburger bun. Now, I'm not going to make these every time I eat a burger or want a sandwich, but it's so fun to have a recipe for buns when I feel like whipping some up.
These burgers taste so gourmet and are pretty easy to make. Yes, it will be more time consuming than the usual burger nights since you'll be making your own buns, but it's so worth the extra time. And you might be wondering why one would put cranberries in a burger? Because it's delicious. That's why. Well, and because I happened to have cranberries and wondered what they'd taste like with beef. Thus this wonderful concoction was born.
I will note that the buns won't be as flavorless and spongy as conventional burger buns. But that's part of the charm and character of using almond flour. I think, too, that these buns would make a great sub for english muffins in a breakfast sandwich or as the base for an open-faced turkey&pesto sandwich. They can be so versatile. I also recommend using them the same day you bake them. They will keep for a day or so, but after that'll get softer so they won't be as functional as a bun [still taste great, though].
Ok, onward to the recipes!

Hamburger Buns

• 1 c blanched almond flour
• ¼ tbsp coconut flour
• 1 tsp baking powder
• ½ tsp baking soda
• ⅓ tsp salt
• ¼ tsp garlic powder
• ¼ tsp pepper
• ⅔  tsp xanthan gum
• 2 eggs
• 2 tbsp butter, softened
• ½ tbsp almond oil
• ¼ c unsweetened plain almond milk [or heavy cream]
• ½ tsp apple cider vinegar
• 1 tbsp sesame seeds, for topping- optional

- Preheat oven to 325º
- Line baking sheet with parchment.
- In small  bowl add dry ingredients and whisk to combine.
- In medium bowl beat remaining ingredients together.
- Add dry in two batches and beat until just incorporated.
- Let dough sit for a few minutes.
- Drop mounds of dough by the ¼ cup two inches apart onto parchment lined baking sheet. Smooth into about a 4” circle [or smaller if you’re making sliders].
- Bake for 17-20 minutes or until springy to touch. [Top with sesame seeds towards the end of baking.]
- Let cool completely before serving.

*Make 3 servings [6 pieces], Sorry I know that's an odd number, but it's just how the recipe worked out.

Cranberry-Herb Bacon Avocado Burgers

*Have bacon pre-cooked crispy.
*Set out sliced avocado, lettuce, onions, cheese, and tomato [or any other toppings you’d want].

• 1 lb. grass-fed ground beef
• ½ c. almond flour
• ⅓ c. fresh cranberries, finely chopped [food processor is good for this with 1 tbsp zsweet]
• ½ tsp rosemary
• ½ tsp thyme
• dash garlic powder
• 1 tsp salt
• ½ tsp fresh ground black pepper
• 1 tbsp bacon fat [or other oil], for cooking

- In a medium bowl combine all ingredients except bacon fat.
- Shape into 4 patties.
- Place in fridge for 5 minutes.
- Heat skillet, add bacon fat.
- Cook patties to desired doneness.

*Serve on almond flour buns with desired toppings.

**ENJOY! And come back and leave a comment- I want to know your thoughts on this.**

1/5/12

- Chocolate Peanut Butter Cupcakes -


Growing up, I was not the biggest fan of peanut butter. I occasionally liked it with bananas. But it was a rare occasion, indeed. It just wasn't my thing. Oh sure, I could've eat Reese's cups for days. The sugar was the culprit for that one, though. But other than that I've not been a big peanut butter / peanut fan. And since peanuts are technically legumes, I don't eat them anymore. That is, until 3 days ago.
See, I was at Whole Foods [my home away from home] and walked past the little station where you can grind your own almond or peanut butter. And it called to me. For the previous two weeks I had been craving peanut butter. Never in my life has that ever happened! Never. But I ignored it. That is until I saw that grinding station. And that is where the magic happened. I saw the nutritional profile for the peanuts that were in the machine to grind up- very similar to almonds. Less carbs, actually. And I thought, "I might as well try it!" So I ground up about four tablespoons of peanut butter and went on my way wandering the rest of the store.
I got home and right away stuck my finger in the freshly ground peanut butter, tasted it, and it was magical! It was so good and tasted so sweet even though it was unsweetened. I was a happy camper. I started to think of all the things I could make with my newfound enjoyment of peanut butter. Naturally, a chocolate peanut butter combo came to mind. I was just going to use a chocolate cupcake recipe I made last week, but I looked in my fridge and realized I was out of coconut flour. Bummer! But it made for a good occasion to try to make a good almond flour chocolate peanut butter cupcake recipe. And it worked. Splendidly! I shared some of these with my two housemates, two coworkers, and a friend and they all really liked these cupcakes. So exciting that I created a recipe that all sorts of people can enjoy. That makes me happy!
These cupcakes are quite dense and filling with a delicious, rich dark chocolate peanut butter flavor. The almond flour adds another layer of nuttiness, as well. I think next time I make them I will experiment with adding a tablespoon or so of coconut flour to cut the almond flour flavor. My original recipe wasn't quite as sweet as I had wanted it so I adjusted the recipe for you. And I know the cupcakes should have frosting on top, but the frosting is inside! [These would be amazing with fresh whipped cream, though.] :)
I truly hope you enjoy these as much as I have!

Chocolate Cupcake


• 3 tbsp coconut oil
• 5 tbsp grass-fed/pastured butter
• 1 oz unsweetened bakers chocolate
• 4 tbsp unsweetened cocoa powder
• 3 organic/pastured eggs
• 2/3 c ZSweet
• 1 1/2 c blanched almond flour
• 1 1/2 tsp vanilla
• 1 1/2 tsp aluminum-free baking powder
• 2 tbsp brewed strong coffee [decaf is a good idea for these!]
• 2 tbsp organic heavy cream

- Preheat oven to 350º and line 9 spots in a cupcake tin with paper liners.
- Melt coconut oil, butter, and bakers chocolate either on the stove or in the microwave, being careful not to scorch the chocolate. Then set aside to cool.
- In a separate medium bowl lightly beat the eggs and zsweet together.
- Add remaining ingredients and beat on low just to incorporate.
- As the mixer is going, slowly pour in the chocolate and beat lightly to mix well.
- Set aside.

Peanut Butter Filling

• 3 oz organic cream cheese, softened
• 2.5 tbsp freshly ground peanut butter, softened
• 1 tbsp organic heavy cream
• 2.5 tbsp ZSweet

- In a small bowl beat all ingredients together until well blended and smooth.
To Put Together

- Scoop a heaping tablespoon of chocolate cupcake batter into each of the lined cups.
- Scoop about a heaping teaspoon or so of the peanut butter mixture onto the chocolate batter and spread evenly.
- Evenly distribute the remaining chocolate batter between them all.
- Bake at 350º for about 15-18 minutes. Check frequently. They will be done when the tops are set in the middle and are firm to the touch.
- Cool in the pan for 10 minutes then remove cupcakes and cool completely on wire rack or countertop.
- Can serve slightly warm, but they are best after they’ve been in the fridge for a day or two. Great cold straight from the fridge or heat for about 8 seconds in the microwave.

**Please come back here and let me know if you've tried these. I truly would love to know what you though of them and if you made any alterations. Thanks and enjoy. :) **

12/24/11

- Dark Chocolate Covered Cookie Dough Truffles -


Merry Christmas Eve to all who celebrate Christmas! I do- it's my favorite holiday. I have some of the best memories that involve Christmas time with my family. Love it. This year, though, I won't be with any family during this lovely holiday. But I will be with my wonderful housemates and some friends from work. Since I will be at someone else's house for Christmas dinner, I wanted to bring a yummy dessert that I could still eat and other people could enjoy, too. I was going to make these cookies, but I decided instead to make dark chocolate covered cookie dough truffles. They just seem more fancy. :) 
I've made them once before a couple months ago and have been wanting to post the recipe here for all of you. The ones I made today are better than the first batch and I'm excited to give you this recipe. An easy and delicious holiday [or anytime!] dessert. You can top these with a dusting of cocoa powder or powdered ZSweet for a decorative touch.

Cookie Dough

• ½ c butter, really soft
• 
½ c ZSweet, powdered [I buy granulated and powder when I need in the blender.]
• ¾ almond flour, firmly packed
• 2 tbsp coconut flour, firmly packed
• 1 tbsp finely ground flaxmeal
• ½ tsp real salt
¼ tsp cinnamon
• 1 tsp vanilla
• ½ c walnuts, chopped very small

- Beat butter and zsweet until mixed & fluffy.
- Add flours, baking soda and salt. Beat on low just until mixed well.
- Stir in vanilla and walnuts.
- Roll dough into about 20 balls.
- Cover dough and place in the fridge for 10-15 minutes.
[- While dough is chilling, make chocolate shell.]


Chocolate Shell


• 1 oz bakers chocolate
• 4 tbsp coconut oil [can use unsalted butter]
• ¼ c ZSweet, powdered [I buy granulated and powder it when I need to in the blender.]
• 3 tbsp cocoa powder
• 1 tsp vanilla


- In a small saucepan over low heat melt bakers chocolate, coconut oil, and ZSweet. Stir frequently.
- When melted, remove from heat and add cocoa powder and vanilla. Stir well to incorporate.

To Make Truffles

- Line a cookie sheet with parchment paper.
- Remove dough from fridge.
- Place dough either one-by-one or a few at a time in to the chocolate and coat thoroughly.
- Remove from chocolate and place onto parchment.
- Once all of the cookie dough has been coated in chocolate, place in freezer for 15-20 minutes to harden the chocolate.
- Once the chocolate is hardened, serve or place truffles in an airtight container and store in the fridge.

*Enjoy! And, like always, if you make these please come back here and let me know. :) *

Merry Christmas and happy holidays! I hope you are blessed with peace and joy this season and in this coming new year!

12/8/11

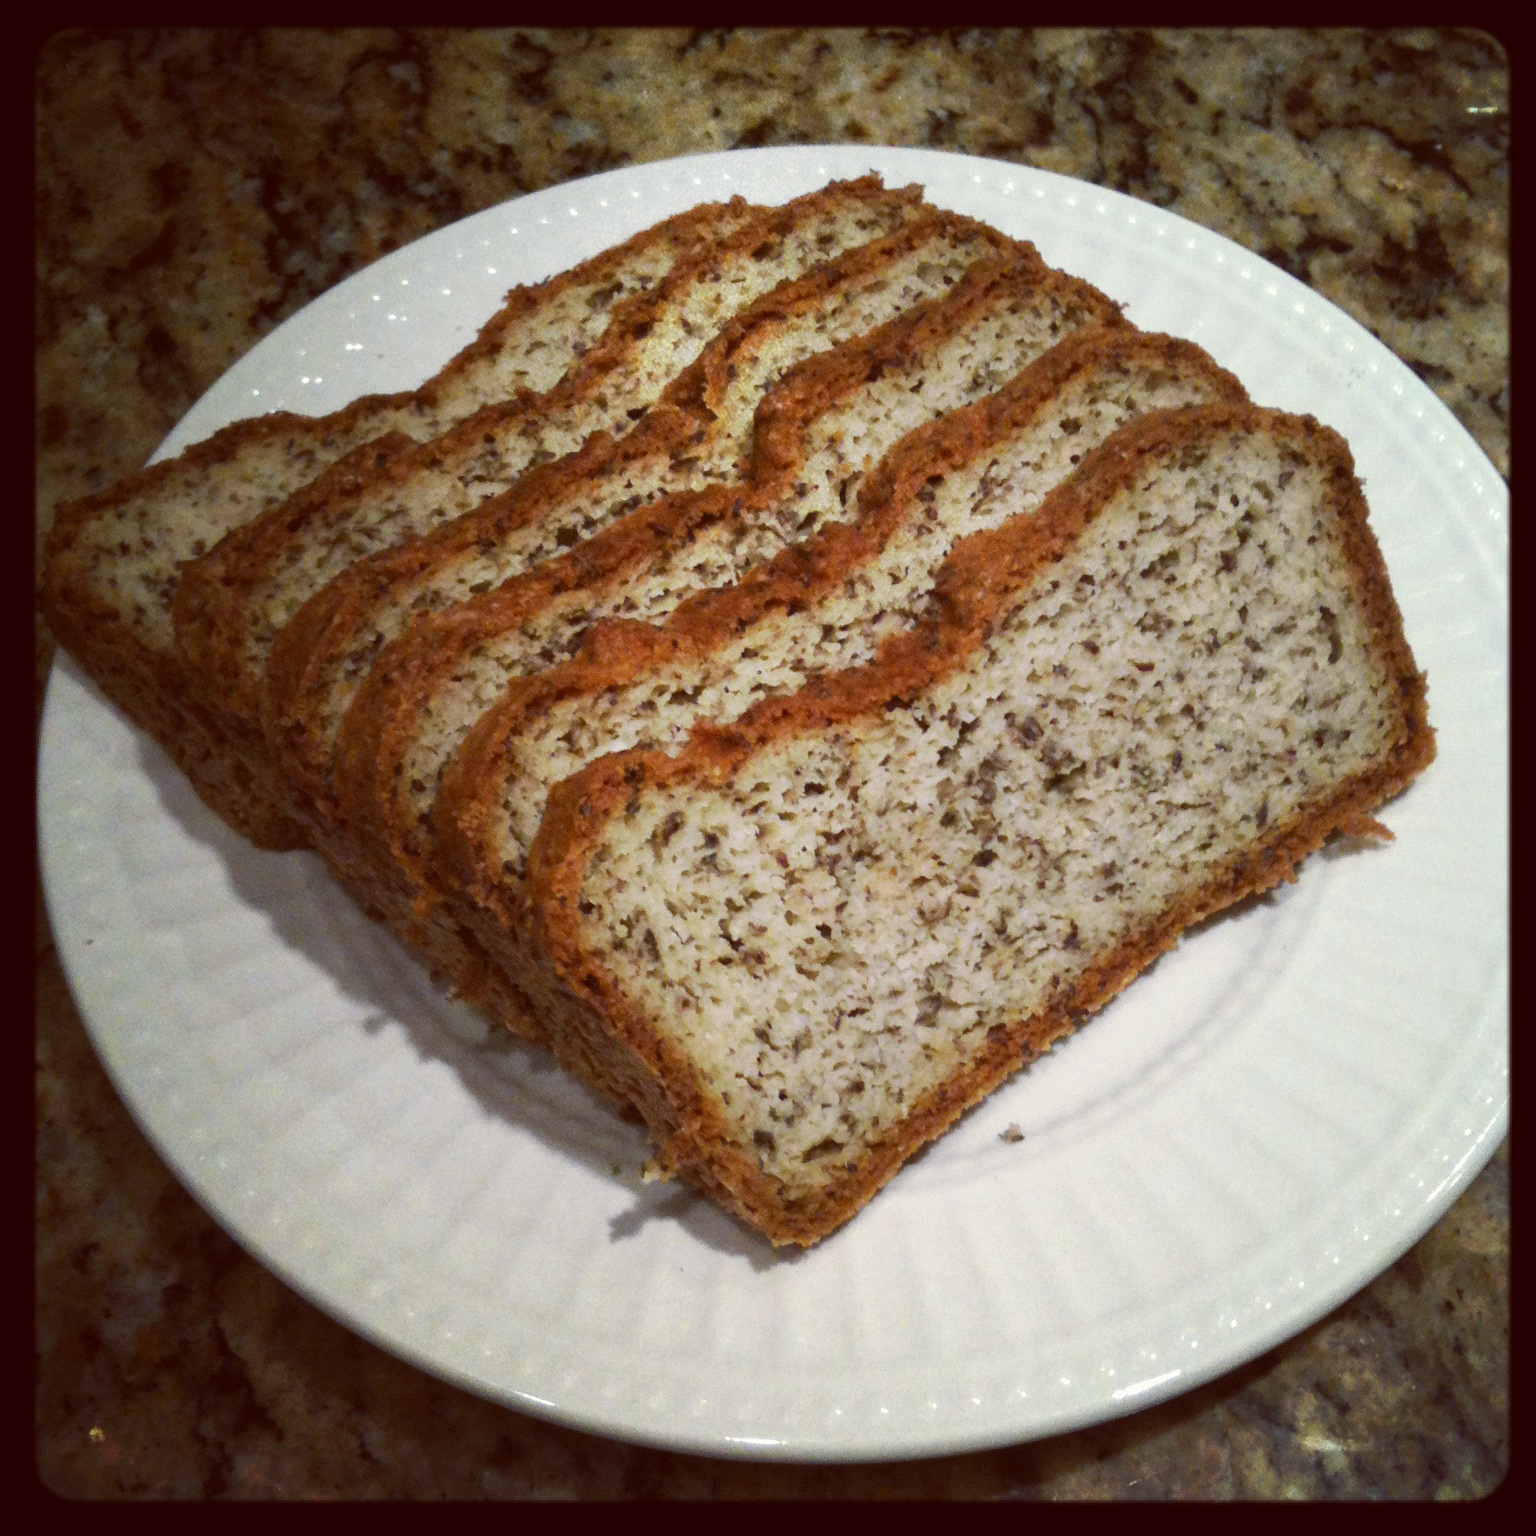
- Almond Flour Bread -


Ok, I admit, there are days when I wish I could just eat a bagel or a croissant [especially a chocolate-filled one], or the bread at a restaurant- partly for taste but also for convenience. But, because I m dedicated to my health and well-being, I choose not to eat them. So on one of those longing-for-a-piece-of-bread days about a month or so ago, I decided to try my hand at creating a grain-free bread recipe. Not a grain-free cupcake or muffin. Nothing sweet. Just a basic loaf of bread, darnit! :)  And while I only had a vague idea of what I was doing the outcome was a success. While in Colorado visiting family two weeks ago I made this the day I arrived. It wasn't for nibbling on- it was supposed to be the base of the grain-free stuffing I was making for Thanksgiving. I had them try little pieces and they all liked it, especially my 21-month old nephew! So that loaf was about gone in 3 days. Needless to say I baked another loaf for the stuffing.
My sister asked me for this recipe because she wanted to be able to have this healthy bread around after I left Colorado. And the other day I got a text from her letting me know she made this bread and it turned out great!
I am quite happy with this bread. Of course, I'll try making different variations, improving it how I can, and whatnot [I've already used this as a base for spice muffins and chocolate coconut muffins. Recipes to come!]. But overall I'm satisfied with this grain-free bread. 
A couple notes for you: If you use a 9"x5" loaf pan the bread won't be tall like a typical loaf of bread. This is normal. But, you could use a 7"x4" loaf pan and it would be taller. I don't know the bake time for a smaller pan, so if you try it please let me know! Also, this bread can be toasted but watch it carefully- it burns quickly. And lastly, because it's almond flour it is dense and quite filing. Delicious with any meal or as a snack!


Almond Flour Bread

• 2 c blanched almond flour
• ⅓ c flax meal / ground flax
• ½ tbsp coconut flour
• 2 tsp baking powder
•1 tsp baking soda
• ¾ tsp salt
• 1 tsp xanthan gum
• 4 eggs
• 3 tbsp butter, softened
• 1 tbsp olive
• 1 tbsp almond oil
• ½ c. whole milk Or almond milk
• ¾ tbsp apple cider vinegar

- Preheat oven to 350º and grease&dust w/ almond flour a 9x5 metal loaf pan.
- Add all ingredients together in a large bowl and beat/mix until incorporated.
- Scoop into loaf pan and bake for 50-55 minutes.
- Let cool in pan for at least 10 minutes. 
- Turn out and let cool on wire rack. [Store in the fridge!]
- Eat and enjoy!

* If you try this recipe, please come back and let me know. I'd love to know what you think of it or any variations you might have made.*