Showing posts with label easy. Show all posts
7/31/13
Easy Ginger Kombucha Peach Gelatin Bites
Hi everyone!
So, I love Pinterest. It's awesome. I have a board titled "Yummy" and I mostly pin things I can actually eat. :) The weird thing is that I don't typically read the blogs the recipes come from- I usually just repin the posts for inspiration from the photos. Which is what happened yesterday. (I think I glanced at one of the blogs but can't remember which one.)
The lovely Lauren from Empowered Sustenance pinned a bunch of gelatin recipes that looked delish. See, I've been wanting to try different gelatin recipes but just haven't got around to it yet. I got to thinking that experimenting with gelatin recipes would be a fun thing to do with my 3 year old nephew, Zephyr... And that's what we did! It was SO simple and turned out yummy. Zz ate some and told me that he wanted to make another batch! (In between batches of the gelatin bites, we made a "cookie pie" per his request. It's gluten/dairy/egg/soy free and soooo good. That's for another post.) We went onto making the second batch and it was even better! It's about a 10 minute total prep/set time, too. so it can be made an finished quickly.
I happened to pick up some ginger kombucha that morning and thought that it would be a good base instead of water. I also knew I wanted to add some fresh fruit, too. I knew I wanted these little gelatin bites to be more dense than typical "jello." So, armed with ideas and my cute little helper, I set out to make these yummy treats. I was so surprised and excited that it worked perfectly! They can be so diverse- change the liquid for a different flavor, add different fruit to mix it up. The combinations are endless!
Here's what you'll need:
Measuring cups & spoons
A small saucepan
A whisk
Something to set the gelatin in (like candy molds, an ice cube tray, or silicone cupcake molds (what I used)
Knife and cutting board to cut the fruit pieces
Recipe:
• 1c ginger kombucha (or any other liquid)
• 3 tbsp gelatin from grassfed cows (I use Great Laakes brand)
• A few drops of Kal brand stevia (or whatever your favorite sweetener is equivalent to about 3 tbsp sugar. Of course you can sweeten to taste!)
• 1/4 of a peach cut in 1/4inch slices. (you can use whatever fruit you have on hand.)
- Add kombucha, gelatin, and stevia to the saucepan. Whisk together over low heat until gelatin is dissolved and the liquid is clear. Remove from heat.
- Pour into your mold of choice. If using something like silicone muffin cups, only fill them about 1/3 of the way.
- Chop fruit and add desired quantity to each portion of gelatin mixture.
- Place in freezer for 5 minutes to set. (I didn't have patience to wat for them to set in the fridge. but since they are small, I bet they'd still set pretty quickly in the fridge. Set them however you'd like.)
- Eat and enjoy.
(Store in the fridge once they are set.)
If you make these, please let me know what you think!
5/26/13
I Might Be Back! (And a recipe for Cheesy Biscuits)
Well, hi everyone!
It's great and scary to be writing this blog post for you. I've not blogged in over a year (has it really been that long?) and have had good reason. I've moved across the country, been dealing with some heath issues, and have been adjusting to a new job in a new city. Lots of overwhelming things. But thankfully God is good. And here I am, slowly gaining traction in my new life.
See, I was planning on putting together a little cookbook but that got pushed to the (way) back burner. I think someday I will do it, but now is not that time. But I often have people ask me for my recipes so I thought I'd post some of them here for you lovely people. No guarantees on how often I'll post, but I promise will get a few good ones out to you! :)
I thought I'd kick off this new season of posting with a recipe that I've made over and over (and usually with my little nephew helping me) because they are just that good and easy.
Cheesy Biscuits!
Yep, cheesy and buttery and grain/gluten free! Now, these aren't like Pillsbury flaky biscuits or the kind that you'd get at a diner with gravy. These have a different texture- perhaps like a cheesy cornbread texture? (I've never liked cornbread, just so you know.) Anyway, they are prefect with any meal right out of the oven! Yum, just writing this post is making me want to go bake these right now.
Ok, enough with the talk, here's the recipe (and photos!)
LC's Best Biscuits
*Please let me know what you think of them or how you altered them to fit your lifestyle. I'd love to know!
Thanks for reading.
- Lindsay
© Lindsay Coleman - do not use or reproduce without giving direct credit and linking back to this post.
It's great and scary to be writing this blog post for you. I've not blogged in over a year (has it really been that long?) and have had good reason. I've moved across the country, been dealing with some heath issues, and have been adjusting to a new job in a new city. Lots of overwhelming things. But thankfully God is good. And here I am, slowly gaining traction in my new life.
See, I was planning on putting together a little cookbook but that got pushed to the (way) back burner. I think someday I will do it, but now is not that time. But I often have people ask me for my recipes so I thought I'd post some of them here for you lovely people. No guarantees on how often I'll post, but I promise will get a few good ones out to you! :)
I thought I'd kick off this new season of posting with a recipe that I've made over and over (and usually with my little nephew helping me) because they are just that good and easy.
Cheesy Biscuits!
Yep, cheesy and buttery and grain/gluten free! Now, these aren't like Pillsbury flaky biscuits or the kind that you'd get at a diner with gravy. These have a different texture- perhaps like a cheesy cornbread texture? (I've never liked cornbread, just so you know.) Anyway, they are prefect with any meal right out of the oven! Yum, just writing this post is making me want to go bake these right now.
Ok, enough with the talk, here's the recipe (and photos!)
![]() |
| Fresh out of the oven! |
![]() |
| Biscuits and gravy. YUM! |
![]() |
| me with a tray of goodness :) |
LC's Best Biscuits
• 1 ½ c fine almond flour ( I like Honeyville, but most kinds will work)
• ¾ c shredded mozzarella cheese (or whatever kind of shredded cheese you want.)
• 6 tbsp butter, softened
• 2 eggs
• 1 tsp aluminum-free baking powder
• 1/4 tsp xanthan gum
• 1 ½ tsp cider vinegar
• and dash of salt
- Preheat oven to 375º and line a baking sheet with parchment paper.
- With a stand or hand mixer, combine all ingredients well.
- Portion out six to eight equal scoops of dough (free-form adds to the charm) about two inches apart on the cookie sheet.
- Place in oven and reduce heat to 350º.
- Bake for 12-15 minutes or until browned.
- Remove from oven and serve right away. *Please let me know what you think of them or how you altered them to fit your lifestyle. I'd love to know!
Thanks for reading.
- Lindsay
© Lindsay Coleman - do not use or reproduce without giving direct credit and linking back to this post.
Labels:
almond flour,
bread,
breakfast,
cheesy,
dinner,
easy,
grain free,
snack
1/11/12
- Hot Fudge -
I like chocolate. A lot. And this summer when I decided to go full-force into eating well, I was sad to give up sugar-heavy chocolates of all sorts. Even dark chocolate since it has sugar in it. You can't imagine my grand excitement when I found a recipe to make homemade chocolate chips with with sweetener I already use [Zsweet]! Oh goodness, I was so entirely excited to have chocolate again- and to actually make it. Since the first time trying that initial recipe I have changed it nearly every time I whip it up. I like to tinker with recipes each time I make them. This was no exception.
So, last week I was making some chocolate just to have on hand when I noticed this batch of chocolate looked quite different than normal- it was greasy. Well, actually, it's looked like this one or two times before, but I think what was different this time was that I could see it as something different. I saw it as something other than a chocolate bar or chocolate chips or chocolate coating. I saw it as hot fudge. And my life was forever changed. That may or may not be an exaggeration. But it certainly made me intrigued. I decided to try something I hadn't done while making this chocolate before- beat it with the mixer. That was just the ticket. It created this beautiful, thick, dark chocolate fudge. And it was glorious! I made it three times in a week. And if I hadn't run out of Zsweet yesterday, I'd have made it again today. To say that I really like this chocolate would be an understatement. The consistency is perfect for hot fudge- thick, smooth, and rich. A deep chocolaty flavor with just the right amount of sweetness.
I, of course, had to figure out what I could put it on and came up with a quick and easy machine-less ice cream. The recipe for that will come soon. Also, with half of the initial hot fudge batch I made a flourless chocolate cake [!!!]. And I'm not kidding when I say it's one of the best desserts I have ever eaten. The recipe for that will be on here pretty soon as well. Keep a look out!
But for now, without further ado, here is the Hot Fudge recipe I know some of you have been waiting for. I am so excited about this and was giddy to be able to share it with you! ENJOY!
• 4 tbsp unsalted butter [grass-fed/pastured or organic]
• ¼ c heavy cream [raw or organic]
• ¼ c zsweet
• 5 tbsp cocoa powder, unsweetened [organic]
• 1 tsp vanilla [organic]
- Heat butter, cream , and zsweet in a small saucepan over medium-low heat until butter is melted. Stir occasionally.
- Remove from heat and add cocoa powder and vanilla, mix with a spatula until smooth. (Note- it might seem greasy. Don’t worry.]
- Let cool for about 5 minutes.
- Pour chocolate into a small mixing bowl and beat for about a minute or until smooth and glossy.
- Serve immediately. (Or store in an airtight container in the fridge. When ready to use, portion out the desired amount and microwave for a few seconds.)
- * This can also be used as ganache. It's got a smooth texture and firms up nicely in the fridge but doesn't get too hard. It's great!
*Please let me know if You've tried this recipe. I'd love to hear about your experience! Comment back here. Thank you.*
12/24/11
- Dark Chocolate Covered Cookie Dough Truffles -
Merry Christmas Eve to all who celebrate Christmas! I do- it's my favorite holiday. I have some of the best memories that involve Christmas time with my family. Love it. This year, though, I won't be with any family during this lovely holiday. But I will be with my wonderful housemates and some friends from work. Since I will be at someone else's house for Christmas dinner, I wanted to bring a yummy dessert that I could still eat and other people could enjoy, too. I was going to make these cookies, but I decided instead to make dark chocolate covered cookie dough truffles. They just seem more fancy. :)
I've made them once before a couple months ago and have been wanting to post the recipe here for all of you. The ones I made today are better than the first batch and I'm excited to give you this recipe. An easy and delicious holiday [or anytime!] dessert. You can top these with a dusting of cocoa powder or powdered ZSweet for a decorative touch.
Cookie Dough
• ½ c butter, really soft
• ½ c ZSweet, powdered [I buy granulated and powder when I need in the blender.]
• ½ c butter, really soft
• ½ c ZSweet, powdered [I buy granulated and powder when I need in the blender.]
• ¾ almond flour, firmly packed
• 2 tbsp coconut flour, firmly packed
• 1 tbsp finely ground flaxmeal
• ½ tsp real salt
• ¼ tsp cinnamon
• 2 tbsp coconut flour, firmly packed
• 1 tbsp finely ground flaxmeal
• ½ tsp real salt
• ¼ tsp cinnamon
• 1 tsp vanilla
• ½ c walnuts, chopped very small
- Beat butter and zsweet until mixed & fluffy.
- Add flours, baking soda and salt. Beat on low just until mixed well.
• ½ c walnuts, chopped very small
- Beat butter and zsweet until mixed & fluffy.
- Add flours, baking soda and salt. Beat on low just until mixed well.
- Stir in vanilla and walnuts.
- Roll dough into about 20 balls.
- Cover dough and place in the fridge for 10-15 minutes.
[- While dough is chilling, make chocolate shell.]
[- While dough is chilling, make chocolate shell.]
Chocolate Shell
• 1 oz bakers chocolate
• 4 tbsp coconut oil [can use unsalted butter]• 1 oz bakers chocolate
• ¼ c ZSweet, powdered [I buy granulated and powder it when I need to in the blender.]
• 3 tbsp cocoa powder
• 1 tsp vanilla
• 1 tsp vanilla
- In a small saucepan over low heat melt bakers chocolate, coconut oil, and ZSweet. Stir frequently.
- When melted, remove from heat and add cocoa powder and vanilla. Stir well to incorporate.
To Make Truffles
- Line a cookie sheet with parchment paper.
- Remove dough from fridge.
- Place dough either one-by-one or a few at a time in to the chocolate and coat thoroughly.
- Remove from chocolate and place onto parchment.
- Once all of the cookie dough has been coated in chocolate, place in freezer for 15-20 minutes to harden the chocolate.
- Once the chocolate is hardened, serve or place truffles in an airtight container and store in the fridge.
*Enjoy! And, like always, if you make these please come back here and let me know. :) *
Merry Christmas and happy holidays! I hope you are blessed with peace and joy this season and in this coming new year!
Labels:
almond flour,
chocolate,
coconut flour,
cookies,
dessert,
easy,
egg free,
flax,
grain free,
walnuts
12/18/11
- Mexican Meatloaf with Jalapeño Lime Cream Sauce -
Tonight was one of those nights where I just stared into my fridge trying to decided what to make for dinner- which would also be my main meal for the next couple days. I really wanted to make something simple, but something I've not made before... something simple with ground beef. Simple for me would be meatloaf. And it's flavorful & healthy. But I didn't want traditional meatloaf. I wanted something with character. With spice. I though for a second about how I could change it up and, A-ha! Mexican spice meatloaf. As I was getting the ingredients out of the fridge for that, I saw a carton of jalapeños I needed to use. Immediately I remembered the jalalpeño mushroom cream sauce I came up with a couple months ago that topped a quesadilla I had made. Though this time I didn't want a mushroom sauce so I decided to omit the mushrooms and add lime juice instead.
Satisfied with my plan for dinner I got to making the meatloaf and while it was in the oven I made another test batch of brownies. :) I think this is my 5th test batch in a week to figure out how to make a delish grain-free, sugar-free brownie without following someone else's recipe. It's more challenging than I anticipated. Good thing I like challenges!
Anyway, back to the meatloaf- when it was done cooking, I poured some of the drippings into a skillet and made the jalapeño lime cream sauce. While that was simmering I cut a green bell pepper and half an avocado, plated them with the meatloaf slices and then topped it with the lovely sauce.
I was really excited to try this and didn't want to take the time to take pictures, but I shot one with my phone just in case this meal was blog-worthy. This photo below was, like, 30 seconds before I ate the meal all up. It was SO good. I could eat this everyday!
The meatloaf itself was tender, moist, rich, and filling- but not heavy. And the sauce complimented it wonderfully: a subtly flavored sauce that blended well with the spices in the meatloaf. The avocado added more richness and creaminess while the green peppers added a nice fresh crunch. What a tasty and simple to prepare meal. This will now be a staple meal for me. As it is full of super healthy fats and protein, while being low in carbs and is grain-free. I hope you enjoy it, too.
Mexican Meatloaf
• 1 ½ lbs grass-fed ground beef
• 2 organic eggs, beaten
• ¾ c blanched almond flour
• ½ onion, finely chopped• ½ green bell pepper, finely chopped
• 1 small tomato, chopped
• 1 ½ tsp cumin
• 1 tsp chili powder
• ⅛ tsp cayenne [or more to taste]
• ½ tsp oregano
• 1 tsp real salt
• ½ tsp black pepper
- Preheat oven to 360º
- Mix all ingredients well.
- Place in loaf pan and bake for 40 mins.
- Let cool in pan at least 10 minutes.
- Slice and serve with jalapeno lime cream sauce.
• 1 ½ lbs grass-fed ground beef
• 2 organic eggs, beaten
• ¾ c blanched almond flour
• ½ onion, finely chopped• ½ green bell pepper, finely chopped
• 1 small tomato, chopped
• 1 ½ tsp cumin
• 1 tsp chili powder
• ⅛ tsp cayenne [or more to taste]
• ½ tsp oregano
• 1 tsp real salt
• ½ tsp black pepper
- Preheat oven to 360º
- Mix all ingredients well.
- Place in loaf pan and bake for 40 mins.
- Let cool in pan at least 10 minutes.
- Slice and serve with jalapeno lime cream sauce.
Jalapeño Lime Cream Sauce
• 1 c water
• ½ c organic heavy cream
• 3 tbsp plain organic yogurt Or organic sour cream
• 3 jalapenos, seeded and chopped [save seeds from 1 pepper]
• juice from half a large lime or a whole small one
- Add everything into a pan and simmer for about 10-15 minutes stirring frequently.
- When sauce thickens and jalapeño pieces soften, it’s ready.
- Serve over Mexican Meatloaf or any other dish you’d like and enjoy! :)
• 1 c water
• ½ c organic heavy cream
• 3 tbsp plain organic yogurt Or organic sour cream
• 3 jalapenos, seeded and chopped [save seeds from 1 pepper]
• juice from half a large lime or a whole small one
- Add everything into a pan and simmer for about 10-15 minutes stirring frequently.
- When sauce thickens and jalapeño pieces soften, it’s ready.
- Serve over Mexican Meatloaf or any other dish you’d like and enjoy! :)
*As always, If you try this [or any!] recipe, please come back here and let me know. I'd love to hear how you liked it or any changes you made. :)
12/8/11
- Almond Flour Bread -
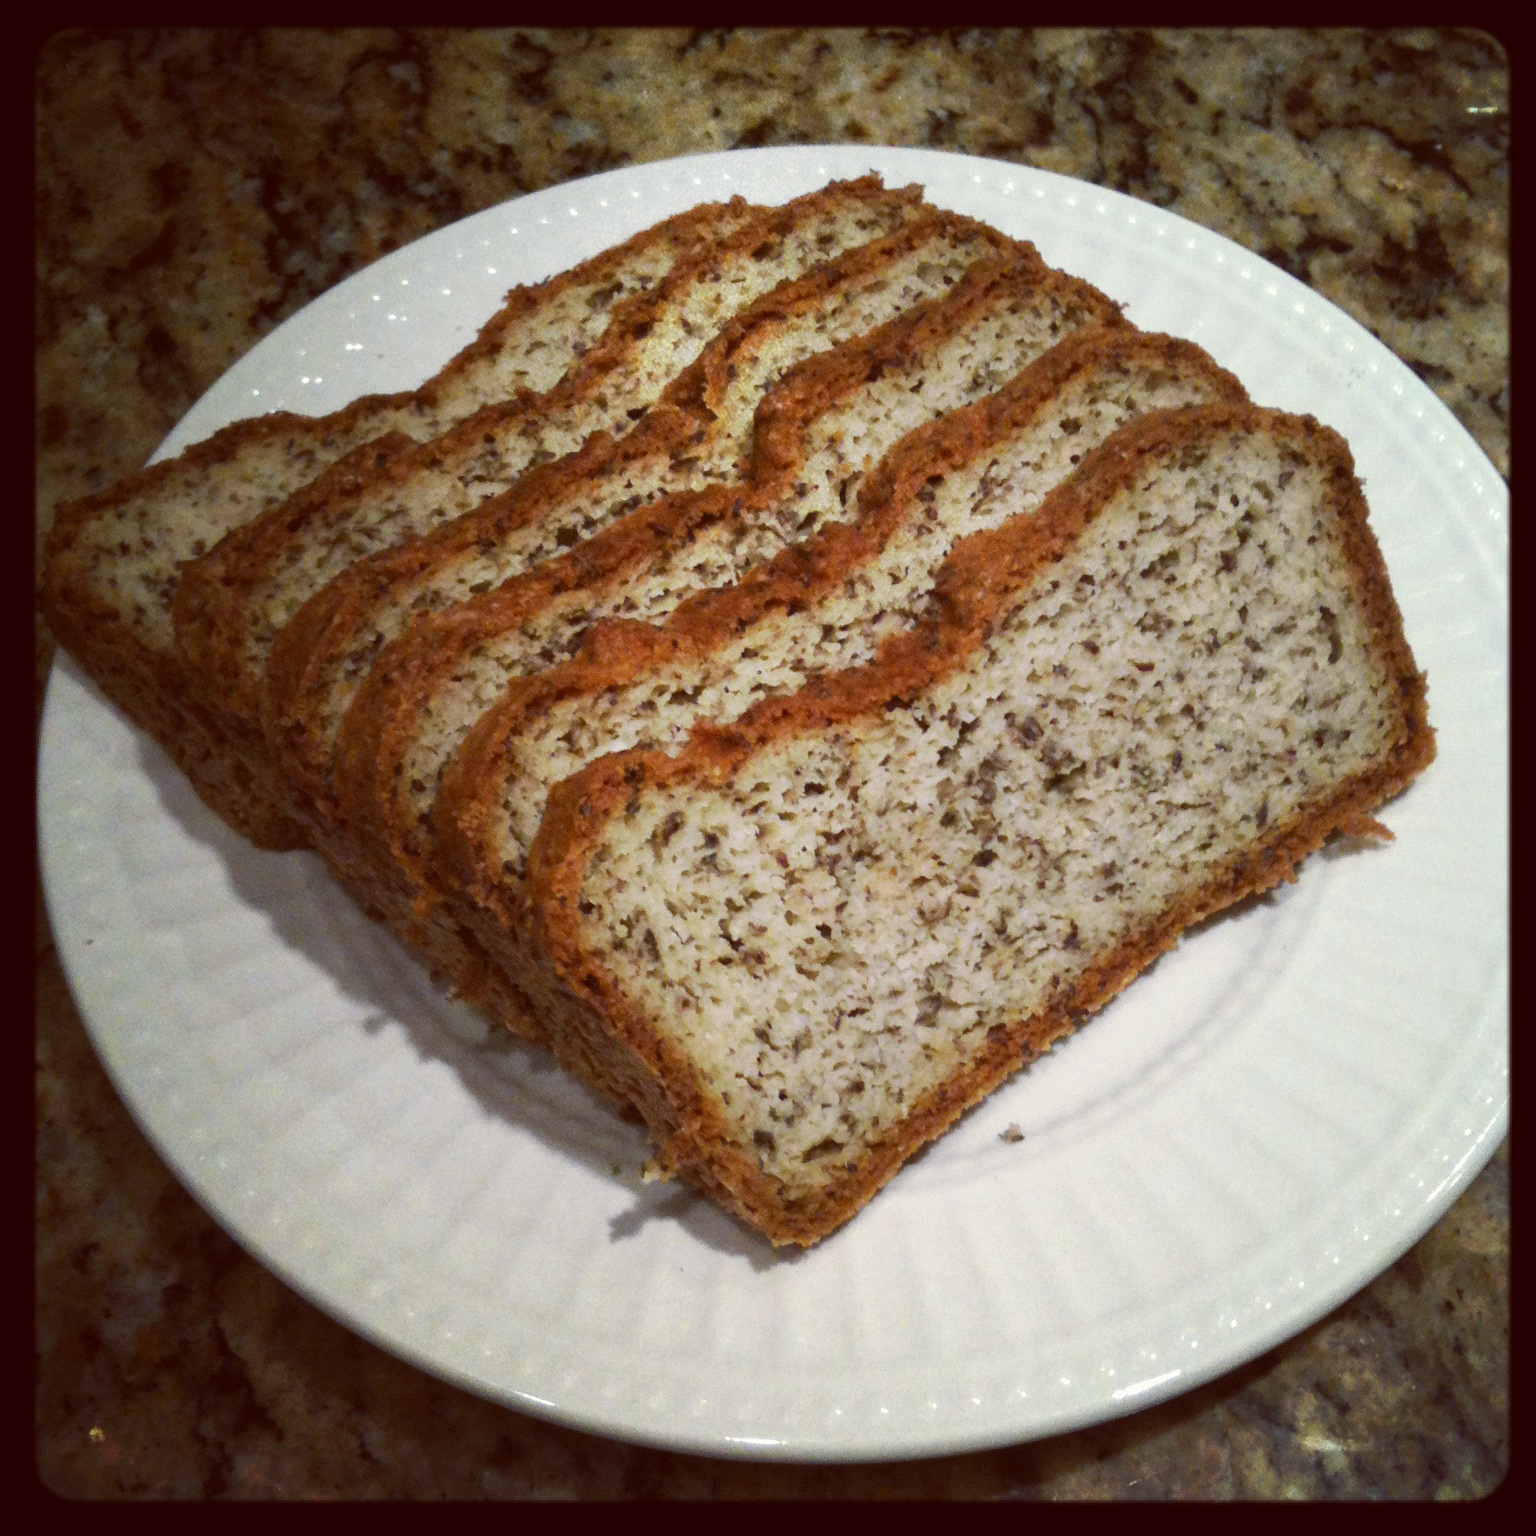
Ok, I admit, there are days when I wish I could just eat a bagel or a croissant [especially a chocolate-filled one], or the bread at a restaurant- partly for taste but also for convenience. But, because I m dedicated to my health and well-being, I choose not to eat them. So on one of those longing-for-a-piece-of-bread days about a month or so ago, I decided to try my hand at creating a grain-free bread recipe. Not a grain-free cupcake or muffin. Nothing sweet. Just a basic loaf of bread, darnit! :) And while I only had a vague idea of what I was doing the outcome was a success. While in Colorado visiting family two weeks ago I made this the day I arrived. It wasn't for nibbling on- it was supposed to be the base of the grain-free stuffing I was making for Thanksgiving. I had them try little pieces and they all liked it, especially my 21-month old nephew! So that loaf was about gone in 3 days. Needless to say I baked another loaf for the stuffing.
My sister asked me for this recipe because she wanted to be able to have this healthy bread around after I left Colorado. And the other day I got a text from her letting me know she made this bread and it turned out great!
I am quite happy with this bread. Of course, I'll try making different variations, improving it how I can, and whatnot [I've already used this as a base for spice muffins and chocolate coconut muffins. Recipes to come!]. But overall I'm satisfied with this grain-free bread.
A couple notes for you: If you use a 9"x5" loaf pan the bread won't be tall like a typical loaf of bread. This is normal. But, you could use a 7"x4" loaf pan and it would be taller. I don't know the bake time for a smaller pan, so if you try it please let me know! Also, this bread can be toasted but watch it carefully- it burns quickly. And lastly, because it's almond flour it is dense and quite filing. Delicious with any meal or as a snack!
Almond Flour Bread
• 2 c blanched almond flour
• ⅓ c flax meal / ground flax
• ½ tbsp coconut flour
• 2 tsp baking powder
•1 tsp baking soda
• ¾ tsp salt
• 1 tsp xanthan gum
• 4 eggs
• 3 tbsp butter, softened
• 1 tbsp olive
• 1 tbsp almond oil
• ½ c. whole milk Or almond milk
• ¾ tbsp apple cider vinegar
- Preheat oven to 350º and grease&dust w/ almond flour a 9x5 metal loaf pan.
- Add all ingredients together in a large bowl and beat/mix until incorporated.
- Scoop into loaf pan and bake for 50-55 minutes.
- Let cool in pan for at least 10 minutes.
• 2 c blanched almond flour
• ⅓ c flax meal / ground flax
• ½ tbsp coconut flour
• 2 tsp baking powder
•1 tsp baking soda
• ¾ tsp salt
• 1 tsp xanthan gum
• 4 eggs
• 3 tbsp butter, softened
• 1 tbsp olive
• 1 tbsp almond oil
• ½ c. whole milk Or almond milk
• ¾ tbsp apple cider vinegar
- Preheat oven to 350º and grease&dust w/ almond flour a 9x5 metal loaf pan.
- Add all ingredients together in a large bowl and beat/mix until incorporated.
- Scoop into loaf pan and bake for 50-55 minutes.
- Let cool in pan for at least 10 minutes.
- Turn out and let cool on wire rack. [Store in the fridge!]
- Eat and enjoy!
* If you try this recipe, please come back and let me know. I'd love to know what you think of it or any variations you might have made.*
11/19/11
- Fried Zucchini with a Creamy Dipping Sauce -
Howdy! I hope you all had a lovely Thanksgiving. I sure did!
I've not posted recently because I've been out of town. But I'm back and ready to get you some recipes and more great info.
Onto today's post:
I love fried things. I always have. Thankfully, though, I don't really crave them anymore. But a couple weeks ago, for whatever reason, I wanted to try my hand at making fried onions. They were ok. Tasted good because they were fried, but nothing much to look at. So I decided to try making fried zucchini instead. And it worked SO well. Much better than the onions. I am quite excited about it... not that I fry things regularly. But I'm glad that I have a solid go-to recipe if something needs frying. [Tonight I'm going to try making fried mozzarella sticks with fresh mozzarella from Trader Joe's. And I just devoured a whole pan of baked kale chips!] :)
I've not posted recently because I've been out of town. But I'm back and ready to get you some recipes and more great info.
Onto today's post:
I love fried things. I always have. Thankfully, though, I don't really crave them anymore. But a couple weeks ago, for whatever reason, I wanted to try my hand at making fried onions. They were ok. Tasted good because they were fried, but nothing much to look at. So I decided to try making fried zucchini instead. And it worked SO well. Much better than the onions. I am quite excited about it... not that I fry things regularly. But I'm glad that I have a solid go-to recipe if something needs frying. [Tonight I'm going to try making fried mozzarella sticks with fresh mozzarella from Trader Joe's. And I just devoured a whole pan of baked kale chips!] :)
Anyway, after I made the fried zucchini I realized that I didn't have anything to dip it in- it's been so long since I've eaten a dipping sauce. But one can't eat fried zucchini without a sauce! So I peered into my fridge to find things I could whip together real quick. And I mean real quick! I didn't want the warm zucchini to get cold and soggy. So a little bit of this, a little bit of that in the blender and next thing I know I have a creamy, delicious dipping sauce for my delectable fried zucchini. Woo!
I know it's not hard to fry something up, but here's the recipe I came up with in case you're interested. The recipe for the dipping sauce follows.
Fried Zucchini
• 1/2 c. refined almond oil, for frying [Can use coconut oil or macadamia nut oil. If you use unrefined coconut oil, it will taste like coconut. I'd use refined. Do not use olive oil or butter.]
• 1/2 large zucchini, sliced in french fry strips
• 1 egg, beaten
• 1/2 c. blanched almond flour
• 1/2 c. refined almond oil, for frying [Can use coconut oil or macadamia nut oil. If you use unrefined coconut oil, it will taste like coconut. I'd use refined. Do not use olive oil or butter.]
• 1/2 large zucchini, sliced in french fry strips
• 1 egg, beaten
• 1/2 c. blanched almond flour
• 1/4 c. freshly grated parmesan cheese [finely grate]
• pinch salt & pepper• 1/2 tsp tumeric
• couple shakes of garlic powder
- In a small bowl, beat egg.
- In medium bowl add all dry ingerdients and mix together.
- Heat almond oil in skillet until a drop of water sizzles.
- Place a couple strips of zucchini at a time into egg, then into flour mixture and toss to coat.
- After first coat of flour, place zucchini pieces back into egg mixture and then coat again in flour mixture.
- Place coated zucchini in oil and fry about 5 minutes each side. Or until deep golden brown.
-Drain on paper towel.
Serve immediately.
[I got the idea to add parmesan cheese from Maria over at Nutritious and Delicious blog. But this is my own recipe.]
Dipping Sauce
• 1/4 c. cottage cheese
• 1 tbsp cream cheese
• 2 1/2 tbsp organic chicken stock [make sure no sugars or oils are added to it]
• 3/4 tsp dijon mustard
• dash garlic powder
• pinch salt & pepper [to taste]
• 1/8 tsp xanthan gum [optional, makes it a little thicker]
- In blender or food processor blend all ingredients until smooth.
- Pour into serving dish and let set in the fridge for a few minutes.
- Serve with fried zucchini, fresh veggies, chicken, etc.
• 1/4 c. cottage cheese
• 1 tbsp cream cheese
• 2 1/2 tbsp organic chicken stock [make sure no sugars or oils are added to it]
• 3/4 tsp dijon mustard
• dash garlic powder
• pinch salt & pepper [to taste]
• 1/8 tsp xanthan gum [optional, makes it a little thicker]
- In blender or food processor blend all ingredients until smooth.
- Pour into serving dish and let set in the fridge for a few minutes.
- Serve with fried zucchini, fresh veggies, chicken, etc.
**If you try either of these recipes out, please come back and let me know how you liked them or if you altered them and how they turned out. Thanks!
-Enjoy eating-
11/12/11
-Brussels Sprouts & Tomato Soup-
Earlier this week, before I could get to the store, there were several days where I was quite low on groceries. One of those nights I looked in my freezer, which held a few different packs of frozen vegetables, and decided it was the night to try Brussels sprouts for the first time ever. I had seen a couple different ways to cook them and decided I would make the bare-bones version of this recipe. I was a little concerned that I would hate the Brussels sprouts because the only things I've ever heard about them have been negative. But I tried anyway. And LOVED them.
Because they were thawed from being frozen and already slightly soft, I wondered if they'd get even softer or if they'd crisp up a bit while roasting. Soften, and caramelize, they did. When I took them out of the oven, I didn't even wait to plate them before trying one... and then one turned into nearly half the pan. And the flavor was wonderful- not bitter at all. I also happened to really, really enjoy the texture of them because it was reminiscent of squishy french fries which were always my favorite.
While my roommate was giggling at me for how excited I was, I was thinking for ways I could eat them with or in other meals...
-Roasted Brussels Sprouts-
• 1 bag frozen Brussels sprouts, thawed
• 1 ½ Tbsp melted butter [or olive oil or almond oil]
• ½ tsp garlic powder [or 1 clove finely chopped garlic]
• salt&pepper to taste
- Preheat oven to 400º
- Cut each sprout in half, or quarters if it’s large, and place in medium bowl.
- Add butter or oil and seasonings and mix to coat sprouts.
- Place in preheated oven and bake for about 15 minutes or until browned.
- Remove from oven and serve warm or let cool and store in fridge.
• 1 bag frozen Brussels sprouts, thawed
• 1 ½ Tbsp melted butter [or olive oil or almond oil]
• ½ tsp garlic powder [or 1 clove finely chopped garlic]
• salt&pepper to taste
- Preheat oven to 400º
- Cut each sprout in half, or quarters if it’s large, and place in medium bowl.
- Add butter or oil and seasonings and mix to coat sprouts.
- Place in preheated oven and bake for about 15 minutes or until browned.
- Remove from oven and serve warm or let cool and store in fridge.
...The next morning I had some Brussels Sprouts for breakfast, cold, with mini frittattas. Delish.
And later that evening I, again, was staring into my fridge and cupboards trying to figure out what I could make with the few ingredients I had left.
My thought process went something like this: "Large can of tomatoes? Check. A little cream and almond milk? Check. Parmesan cheese? Check. I shall now try to make tomato soup! I wonder if this will work."
I am so excited about this very simple recipe- for just that reason. It's simple. This soup has great flavor- not too rich&creamy that you can only eat two bites, but very a pleasant and roundly flavorful. perfect for these chilly fall days. I was a little bummed when I ate the last of it a few days after I made it. I liked it that much!
For me, the most surprising way I fancied it- my favorite so far- was with the left over Brussels Sprouts [from the previous nights' meal] plopped in. Fabulous. I felt like I was eating at a really fancy restaurant. I could eat that tomato&brussels sprout soup all the time. Seriously. And I didn't ever like tomato soup until a few months ago and had never even tried Brussels sprouts until I made them this week. Who knew it'd be such a winning combination?! Well, I'm sure there are many people, but I haven't taken the time to google it yet. So I was quite surprised with it. If you want to spruce up plain ol' tomato soup, give this a try!
-Tomato Soup-
• (1) 28oz can tomatoes
• 2 ½ c water
• ½ c unsweetened plain almond milk
• ⅓ c heavy cream
• ½ c chicken stock [no sugar added]
• ½ c freshly grated parmesan cheese [not the bagged/shaker pre-shredded kind]
• ⅓ c tomato sauce [no sugar or oils added- check label carefully]
• 1 tsp oregano
• salt & pepper to taste
- In a blender puree the canned tomatoes but leave it a little chunky.
- In a medium sauce pan over high heat add all ingredients and mix well.
- Let boil uncovered for about 20 minutes so it can thicken.
- Turn heat to low and let soup rest for a few minutes.
- Serve warm with Brussels sprouts or let cool and store in the fridge- it reheats perfectly.
• (1) 28oz can tomatoes
• 2 ½ c water
• ½ c unsweetened plain almond milk
• ⅓ c heavy cream
• ½ c chicken stock [no sugar added]
• ½ c freshly grated parmesan cheese [not the bagged/shaker pre-shredded kind]
• ⅓ c tomato sauce [no sugar or oils added- check label carefully]
• 1 tsp oregano
• salt & pepper to taste
- In a blender puree the canned tomatoes but leave it a little chunky.
- In a medium sauce pan over high heat add all ingredients and mix well.
- Let boil uncovered for about 20 minutes so it can thicken.
- Turn heat to low and let soup rest for a few minutes.
- Serve warm with Brussels sprouts or let cool and store in the fridge- it reheats perfectly.
*If you try these recipes, please, please come back and tell me know how they turned out and how you like them. Lets build a community! :)
-ENJOY-
LC
Labels:
brussels sprouts,
dinner,
easy,
lunch,
tomato soup,
warm
Subscribe to:
Posts (Atom)